Satisfying Chocolate Nut Truffles
Highlighted under: Family Baking Recipes
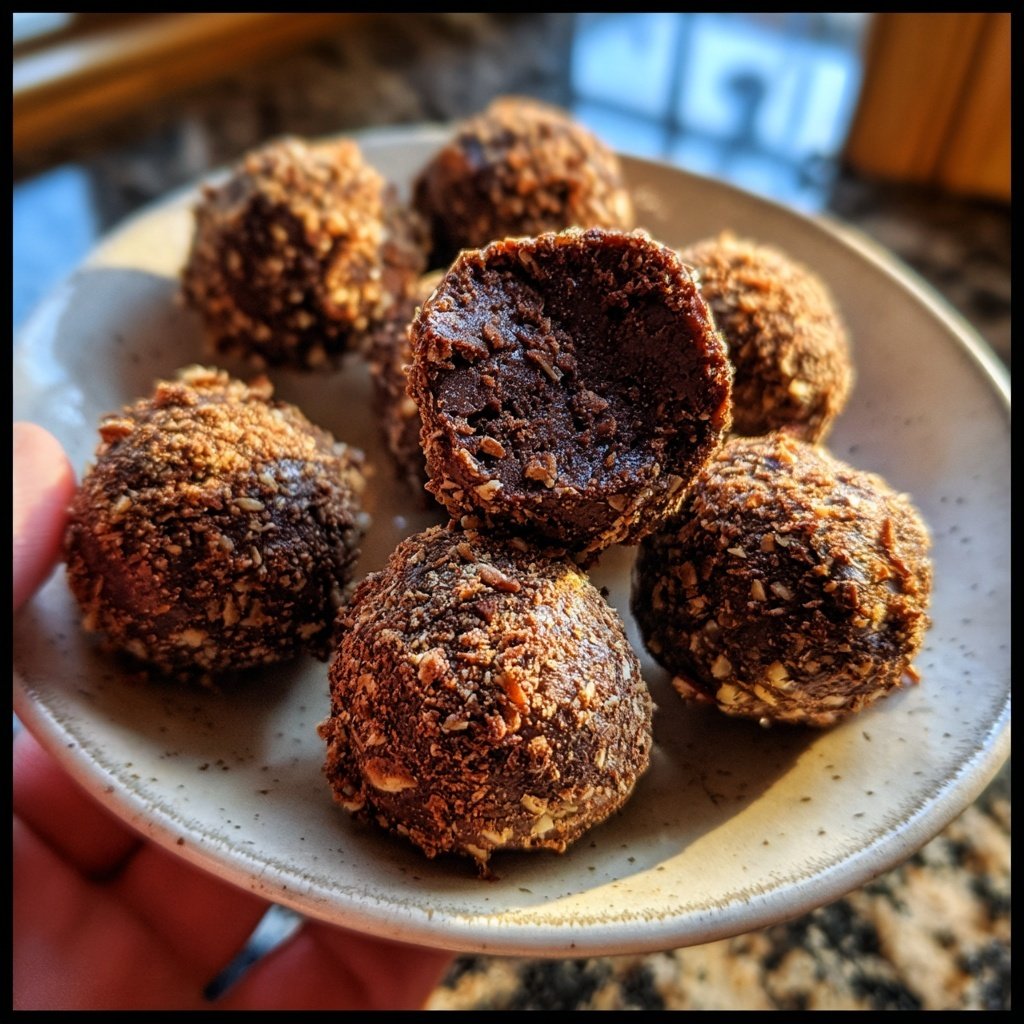
I absolutely love making these Satisfying Chocolate Nut Truffles! The combination of rich chocolate and crunchy nuts creates a delightful contrast that never fails to please. Each truffle is a little bite of indulgence, perfect for satisfying my sweet cravings or impressing guests during gatherings. I enjoy experimenting with different nuts and flavors, and every batch turns out deliciously unique. If you’re looking for a simple yet decadent treat, these truffles are perfect for you and your loved ones.
When I first whipped up these truffles, I was amazed by how quickly they came together. The secret lies in using good quality chocolate, which not only enhances the flavor but also ensures that each truffle melts in your mouth. I prefer dark chocolate because it balances beautifully with the nuts, adding a depth of flavor that's truly satisfying.
One of my favorite tips is to toast the nuts before incorporating them into the mixture; this elevates their flavor and adds a delightful crunch. Whether I’m preparing these for a special occasion or just to satisfy my own sweet tooth, they’re always a hit!
Why You'll Love These Truffles
- Rich chocolate flavor paired with crunchy nuts
- Customizable with your favorite nut varieties
- Perfect for sharing or enjoying yourself
Creating the Perfect Chocolate Mixture
Achieving a silky-smooth chocolate ganache is key to the success of these truffles. When melting the chocolate, ensure that the water beneath is simmering, not boiling, to prevent any moisture from compromising the texture. Stirring constantly helps to achieve a glossy appearance, ensuring that all the chocolate is evenly melted and incorporated with the cream. It’s important to choose good-quality dark chocolate, as the flavor of the chocolate will be the dominant taste in your truffles.
The addition of heavy cream lends a rich texture to the truffles, balancing the bitterness of dark chocolate. If you want a slightly different flavor profile, you could experiment with different types of cream or even non-dairy alternatives like coconut cream. However, keep in mind that these substitutions may affect the overall richness and consistency, so you might need to adjust the amounts to achieve the desired texture.
Mastering the Truffle Shaping Process
When the mixture is chilled and firm, it’s time to shape the truffles. Use a small ice cream scoop or your hands to ensure uniform sizing, which is crucial for presentation and consistency in flavor. Aim for about 1 inch in diameter, as this size offers the perfect balance between a satisfying bite and richness. If the mixture feels too sticky, you can dust your hands with cocoa powder to make the shaping process easier.
While shaping, it's also an opportune moment to think about creativity in flavors. You can incorporate spices like cinnamon or nutmeg into the chocolate mixture, or even add a pinch of sea salt on top before chilling for a delightful contrast that enhances the chocolate’s depth. These small tweaks not only personalize your truffles but also add another layer of flavor that will keep your guests guessing.
Ingredients
Ingredients
For the Truffles
- 200g dark chocolate, chopped
- 100ml heavy cream
- 50g mixed nuts (almonds, walnuts, hazelnuts), chopped
- 2 tablespoons unsweetened cocoa powder
- 1 tablespoon vanilla extract
For Coating (optional)
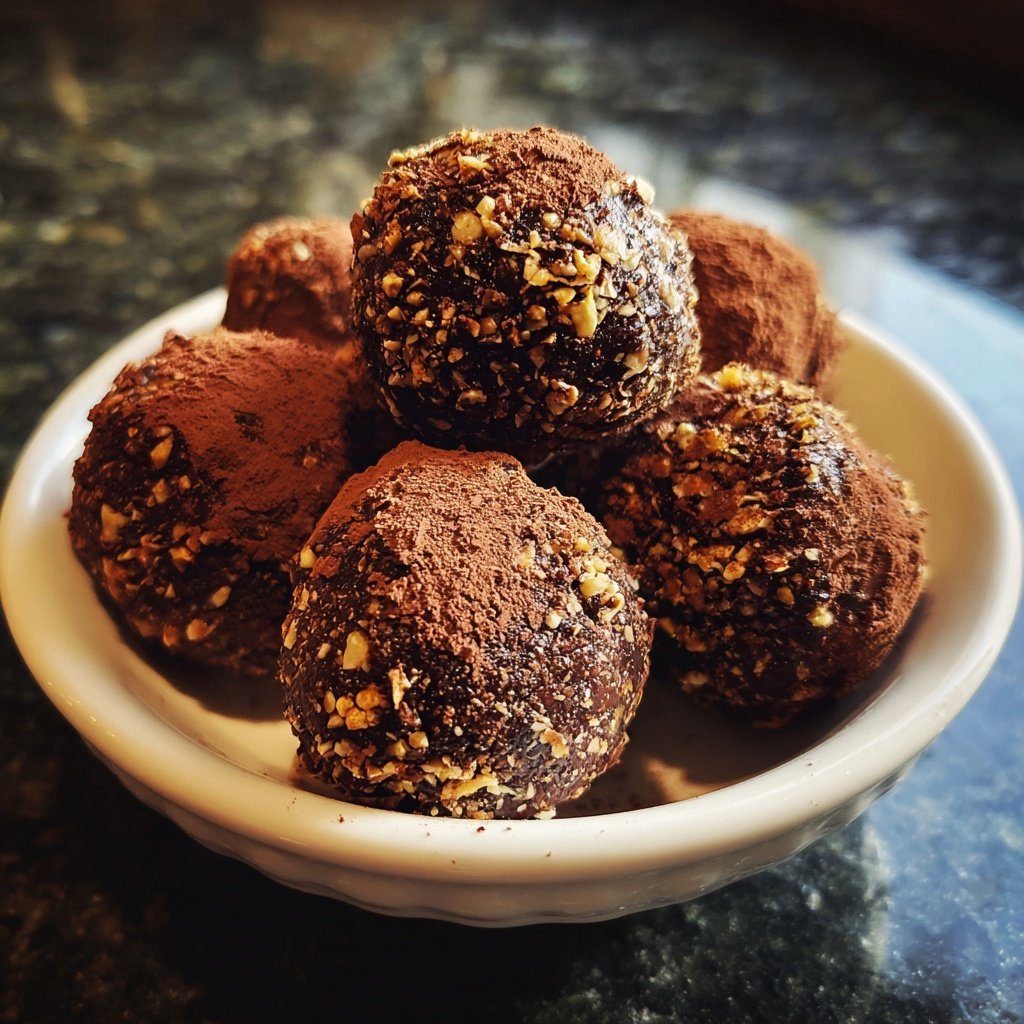
- 50g finely chopped nuts
- 50g desiccated coconut
Instructions
Instructions
Melt the Chocolate
In a heatproof bowl, combine the chopped dark chocolate and heavy cream. Place the bowl over a pot of simmering water, stirring until the chocolate is melted and smooth.
Add Flavorings
Remove the bowl from heat and stir in the chopped nuts, cocoa powder, and vanilla extract until well combined.
Chill the Mixture
Cover the mixture with plastic wrap and refrigerate for about 20 minutes, or until it is firm enough to handle.
Shape into Balls
Once chilled, use a small scoop or your hands to shape the chocolate mixture into small balls, about 1 inch in diameter.
Coat the Truffles (optional)
If desired, roll the truffles in chopped nuts or desiccated coconut until fully coated.
Serve and Enjoy
Place the truffles on a serving platter and enjoy immediately or store in an airtight container in the refrigerator for up to one week.
Pro Tips
- Experiment with different types of chocolate and nuts to create your own signature flavor. You can also add spices like cinnamon or cayenne for a unique twist!
Storage Tips for Your Truffles
Storing these truffles correctly is essential for maintaining their freshness and flavor. Once rolled and coated, they can be placed in an airtight container in the refrigerator for up to a week. For longer storage, consider freezing them. Arrange the truffles on a parchment-lined baking sheet and freeze until solid before transferring them to a freezer-safe container. They can be kept frozen for up to three months, and you can enjoy them straight from the freezer for a cool treat.
When you're ready to serve the frozen truffles, let them sit at room temperature for about 15-20 minutes. This allows them to soften slightly, enhancing their luxurious texture and flavor profile without losing their form. Make sure to label your containers with the date to keep track of freshness!
Flavor Variations and Customizations
One of the great advantages of this recipe is its versatility. Feel free to experiment with different nuts according to your preferences. Pecans, pistachios, or even macadamia nuts can impart distinct flavors and textures. You could also introduce flavors through the addition of liquors like bourbon or rum, which can be blended into the chocolate mixture for a spirited twist that adds sophistication to the truffles.
If you’re in the mood for something more adventurous, consider adding extracts beyond vanilla. Almond extract pairs beautifully with dark chocolate, while coconut extract can give the truffles a tropical flair. Alternatively, try rolling them in crushed freeze-dried fruits such as raspberries or strawberries for a vibrant and tangy finish that contrasts beautifully with the rich chocolate.
Questions About Recipes
→ Can I use milk chocolate instead of dark chocolate?
Yes, but be aware that milk chocolate will add more sweetness and alter the flavor profile.
→ How do I store these truffles?
Store them in an airtight container in the refrigerator for up to a week.
→ Can these truffles be frozen?
Absolutely! Just freeze them in a single layer and transfer to an airtight container for up to three months.
→ What if I have a nut allergy?
You can substitute nuts with seeds like pumpkin seeds or sunflower seeds for added crunch.
Satisfying Chocolate Nut Truffles
Created by: The Nutrimealsource Team
Recipe Type: Family Baking Recipes
Skill Level: Easy
Final Quantity: 16 truffles
What You'll Need
For the Truffles
- 200g dark chocolate, chopped
- 100ml heavy cream
- 50g mixed nuts (almonds, walnuts, hazelnuts), chopped
- 2 tablespoons unsweetened cocoa powder
- 1 tablespoon vanilla extract
For Coating (optional)
- 50g finely chopped nuts
- 50g desiccated coconut
How-To Steps
In a heatproof bowl, combine the chopped dark chocolate and heavy cream. Place the bowl over a pot of simmering water, stirring until the chocolate is melted and smooth.
Remove the bowl from heat and stir in the chopped nuts, cocoa powder, and vanilla extract until well combined.
Cover the mixture with plastic wrap and refrigerate for about 20 minutes, or until it is firm enough to handle.
Once chilled, use a small scoop or your hands to shape the chocolate mixture into small balls, about 1 inch in diameter.
If desired, roll the truffles in chopped nuts or desiccated coconut until fully coated.
Place the truffles on a serving platter and enjoy immediately or store in an airtight container in the refrigerator for up to one week.
Extra Tips
- Experiment with different types of chocolate and nuts to create your own signature flavor. You can also add spices like cinnamon or cayenne for a unique twist!
Nutritional Breakdown (Per Serving)
- Calories: 350 kcal
- Total Fat: 25g
- Saturated Fat: 12g
- Cholesterol: 40mg
- Sodium: 50mg
- Total Carbohydrates: 28g
- Dietary Fiber: 4g
- Sugars: 20g
- Protein: 4g