Satisfying Chocolate Nut Truffles
Highlighted under: Family Baking Recipes
I’m excited to share my Satisfying Chocolate Nut Truffles recipe with you! This indulgent treat combines rich chocolate with the crunchy texture of nuts, creating a delightful bite-sized dessert. I love making these truffles for gatherings or just when I want a sweet pick-me-up at home. The best part is that they come together easily and can be customized to your taste by mixing different nuts or adding a hint of espresso or sea salt for extra depth. Let's dive into this delicious creation!
Creating these Satisfying Chocolate Nut Truffles has become one of my favorite culinary activities. When I first experimented with this combination, I was pleasantly surprised by how the smoothness of the chocolate pairs perfectly with the crunchiness of the nuts. To achieve the ideal texture, I recommend finely chopping the nuts rather than just tossing them in whole. This ensures each bite is a balanced blend of flavors.
Another tip I want to share is the chilling time; allowing the truffles to cool in the refrigerator for at least 30 minutes makes them easier to handle and dip in chocolate. Plus, letting them rest a bit enhances the flavors as they meld together, making each truffle even more satisfying!
Why You'll Love These Truffles
- Decadent chocolate flavor complemented by nutty crunch
- Easy-to-make with no baking required
- Perfect for gifting or a sweet treat any day
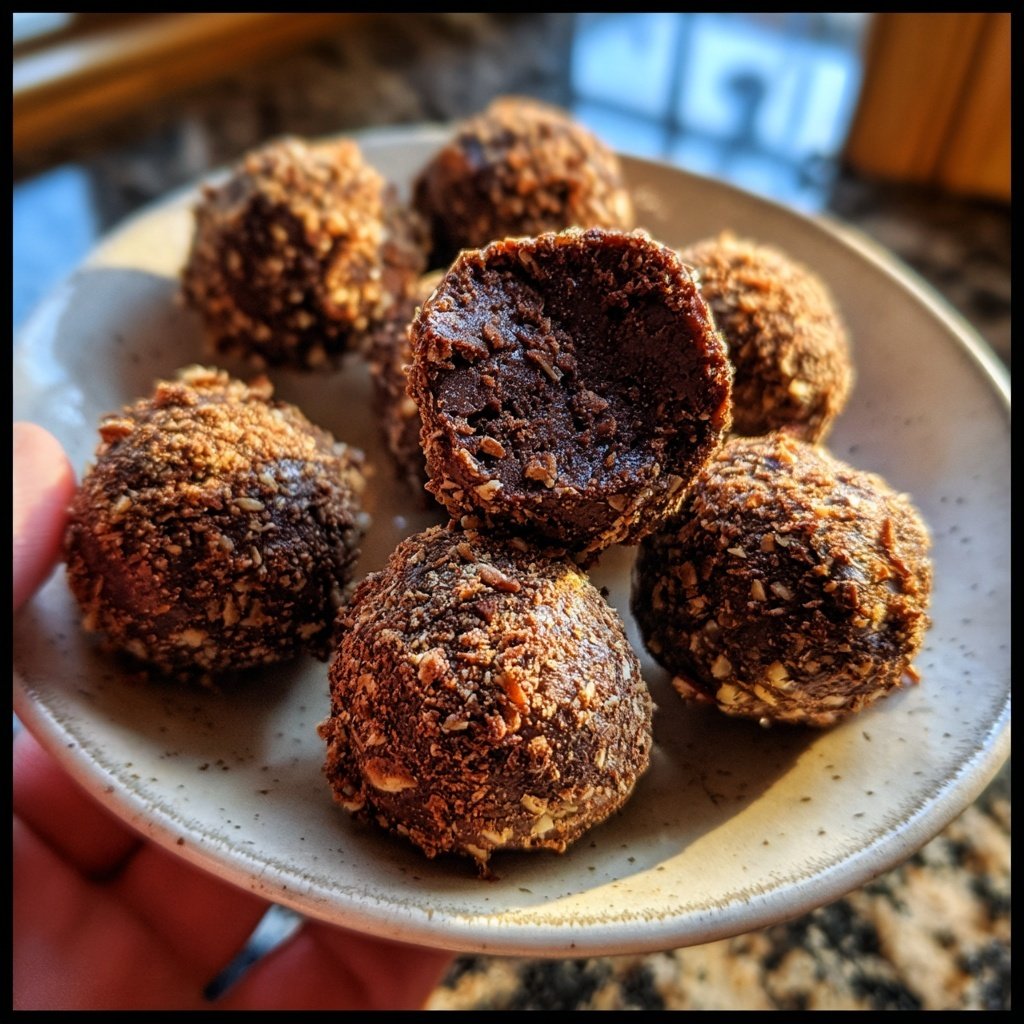
Texture and Flavor Balance
The combination of dark chocolate and mixed nuts in these truffles creates a delightful interplay of creamy richness and satisfying crunch. The dark chocolate, preferably with a cacao content of at least 70%, provides a robust and slightly bitter flavor that contrasts beautifully with the natural sweetness of honey or maple syrup. This balance elevates the overall taste, making each truffle a luxurious bite that is not overly sweet.
When rolling the truffles, ensure they are smooth and uniform in size, approximately 1-inch rounds, for even coating and consistent texture. If the mixture feels too sticky, chilling it for an additional 10 to 15 minutes can help firm it up, making it easier to shape without mess.
Ingredient Variations
One of the best parts about this truffle recipe is its versatility. You can swap out mixed nuts for your favorites or even stick to a single type, like pistachios for a lovely green color and unique flavor. For a more indulgent twist, consider adding a few tablespoons of finely ground espresso beans to the mixture, enhancing the chocolate's richness and providing a gentle coffee kick.
If you're looking for a dairy-free option, ensure that your dark chocolate is labeled vegan, as some brands include dairy. Alternatively, replace honey with agave syrup to accommodate vegan dietary restrictions without compromising sweetness.
Storing and Serving Suggestions
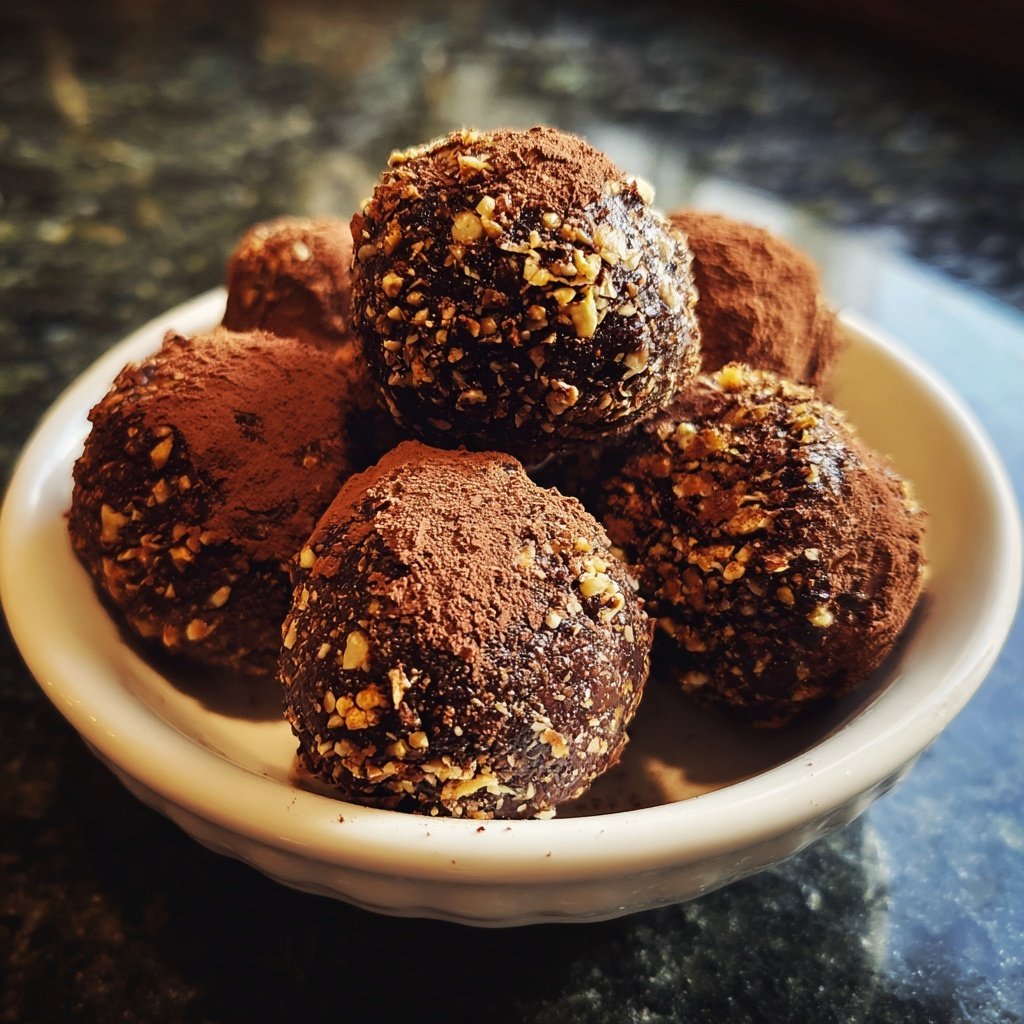
These chocolate nut truffles can be stored in an airtight container in the fridge for up to two weeks, making them an ideal make-ahead treat for gatherings—or a week-long snack at home! For longer storage, consider freezing them. Simple place the formed, uncoated truffles on a baking sheet, freeze until solid, then transfer to a zip-top bag. They can be kept frozen for up to 3 months. Just coat them in chocolate after thawing.
For a visually appealing presentation, arrange the truffles in a decorative box lined with parchment paper. You could also pair them with fresh fruit or coffee for a delightful dessert platter. I love to serve them alongside a glass of dessert wine for a sophisticated touch—the perfect way to end a meal.
Ingredients
Truffle Ingredients
- 200g dark chocolate, chopped
- 100g mixed nuts (almonds, walnuts, pecans), finely chopped
- 1/4 cup honey or maple syrup
- 1/2 teaspoon vanilla extract
- Pinch of salt
Coating Ingredients
- 100g dark chocolate, melted (for coating)
- Chopped nuts or cocoa powder (for rolling)
Instructions
Instructions
Melt the Chocolate
In a heatproof bowl, melt 200g of dark chocolate slowly over a double boiler or in the microwave. Stir until smooth and let it cool slightly.
Mix the Ingredients
Once the chocolate has cooled, add in the finely chopped mixed nuts, honey or maple syrup, vanilla extract, and a pinch of salt. Mix until well combined.
Shape the Truffles
Using your hands, take small amounts of the mixture and roll them into balls. Place these on a baking sheet lined with parchment paper.
Chill the Truffles
Refrigerate the truffles for at least 30 minutes to firm up.
Coat the Truffles
Once chilled, dip each truffle in melted chocolate and roll in chopped nuts or cocoa powder. Return to the baking sheet.
Final Chill
Chill the coated truffles again for about 15 minutes to set the chocolate.
Enjoy!
Pro Tips
- For added richness, use chocolate with a higher cocoa content or experiment with flavored chocolate. You can also customize the nuts based on your preference—for instance, adding a hint of roasted hazelnuts gives a nice twist.
Troubleshooting Common Pitfalls
If your truffle mixture is too crumbly and doesn’t hold together, it could be due to insufficient liquid from the honey or syrup. Adding a teaspoon of melted coconut oil can help bind everything together without altering the flavor. Conversely, if your mixture is too gooey, chilling it for an extra 15 minutes can make shaping easier and produce a firmer truffle.
During the coating process, if the melted chocolate starts to seize or thicken, it’s often due to overheating. Always melt chocolate in a gentle manner, using low heat on your stove or microwave, and stop as soon as most chunks are melted, stirring until glossy. This prevents burning and ensures a smooth coating.
Customization Opportunities
Feel free to get creative with the coatings! Instead of just nuts or cocoa powder, try rolling your truffles in shredded coconut for a tropical twist or crushed freeze-dried berries for a pop of color and tartness. You might even consider adding a dusting of matcha powder, which will introduce both a vibrant green hue and an earthy flavor that beautifully complements the chocolate.
Adding spices such as cinnamon or cardamom to the truffle mixture can enhance its depth. A sprinkle of sea salt on top after coating can also amplify the chocolate flavor, creating a contrast that is simply irresistible. Just be cautious with spice levels to ensure they don't overwhelm the truffle's rich chocolate base.
Questions About Recipes
→ How long do these truffles last?
The truffles can be stored in an airtight container in the refrigerator for up to two weeks.
→ Can I use milk chocolate instead of dark chocolate?
Yes, you can substitute milk chocolate, but the flavor will be sweeter and less intense.
→ Can I make these truffles vegan?
Certainly! Use a dairy-free chocolate and maple syrup in place of honey.
→ Is it necessary to chill the truffles?
Chilling is essential for helping the truffles hold their shape and for easier coating with chocolate.
Satisfying Chocolate Nut Truffles
Created by: The Nutrimealsource Team
Recipe Type: Family Baking Recipes
Skill Level: Easy
Final Quantity: 24 truffles
What You'll Need
Truffle Ingredients
- 200g dark chocolate, chopped
- 100g mixed nuts (almonds, walnuts, pecans), finely chopped
- 1/4 cup honey or maple syrup
- 1/2 teaspoon vanilla extract
- Pinch of salt
Coating Ingredients
- 100g dark chocolate, melted (for coating)
- Chopped nuts or cocoa powder (for rolling)
How-To Steps
In a heatproof bowl, melt 200g of dark chocolate slowly over a double boiler or in the microwave. Stir until smooth and let it cool slightly.
Once the chocolate has cooled, add in the finely chopped mixed nuts, honey or maple syrup, vanilla extract, and a pinch of salt. Mix until well combined.
Using your hands, take small amounts of the mixture and roll them into balls. Place these on a baking sheet lined with parchment paper.
Refrigerate the truffles for at least 30 minutes to firm up.
Once chilled, dip each truffle in melted chocolate and roll in chopped nuts or cocoa powder. Return to the baking sheet.
Chill the coated truffles again for about 15 minutes to set the chocolate.
Extra Tips
- For added richness, use chocolate with a higher cocoa content or experiment with flavored chocolate. You can also customize the nuts based on your preference—for instance, adding a hint of roasted hazelnuts gives a nice twist.
Nutritional Breakdown (Per Serving)
- Calories: 150 kcal
- Total Fat: 10g
- Saturated Fat: 4g
- Cholesterol: 0mg
- Sodium: 20mg
- Total Carbohydrates: 15g
- Dietary Fiber: 2g
- Sugars: 9g
- Protein: 3g